O
ne problem I encountered while working through Test Automation was I couldn’t ensure whether the application layout is the same as design when running or not, though all of test scripts were passed. When automating scenarios, one of the approaches to solving this problem is to capture all screenshots at the points that need to be validated and then the tester will validate them again with the eyes. Repeating the same validation over and over by the eyes is actually extremely painful. And there is no guarantee that validation is not omitted. Have you ever been concerned that your test scripts were missing the eyes but aren’t sure how to resolve these? This recap is for you.
[Demonstration]
Your Tests Lack Vision: Adding Eyes to Your Automation Framework by Angie Jones
Video:
Slide:
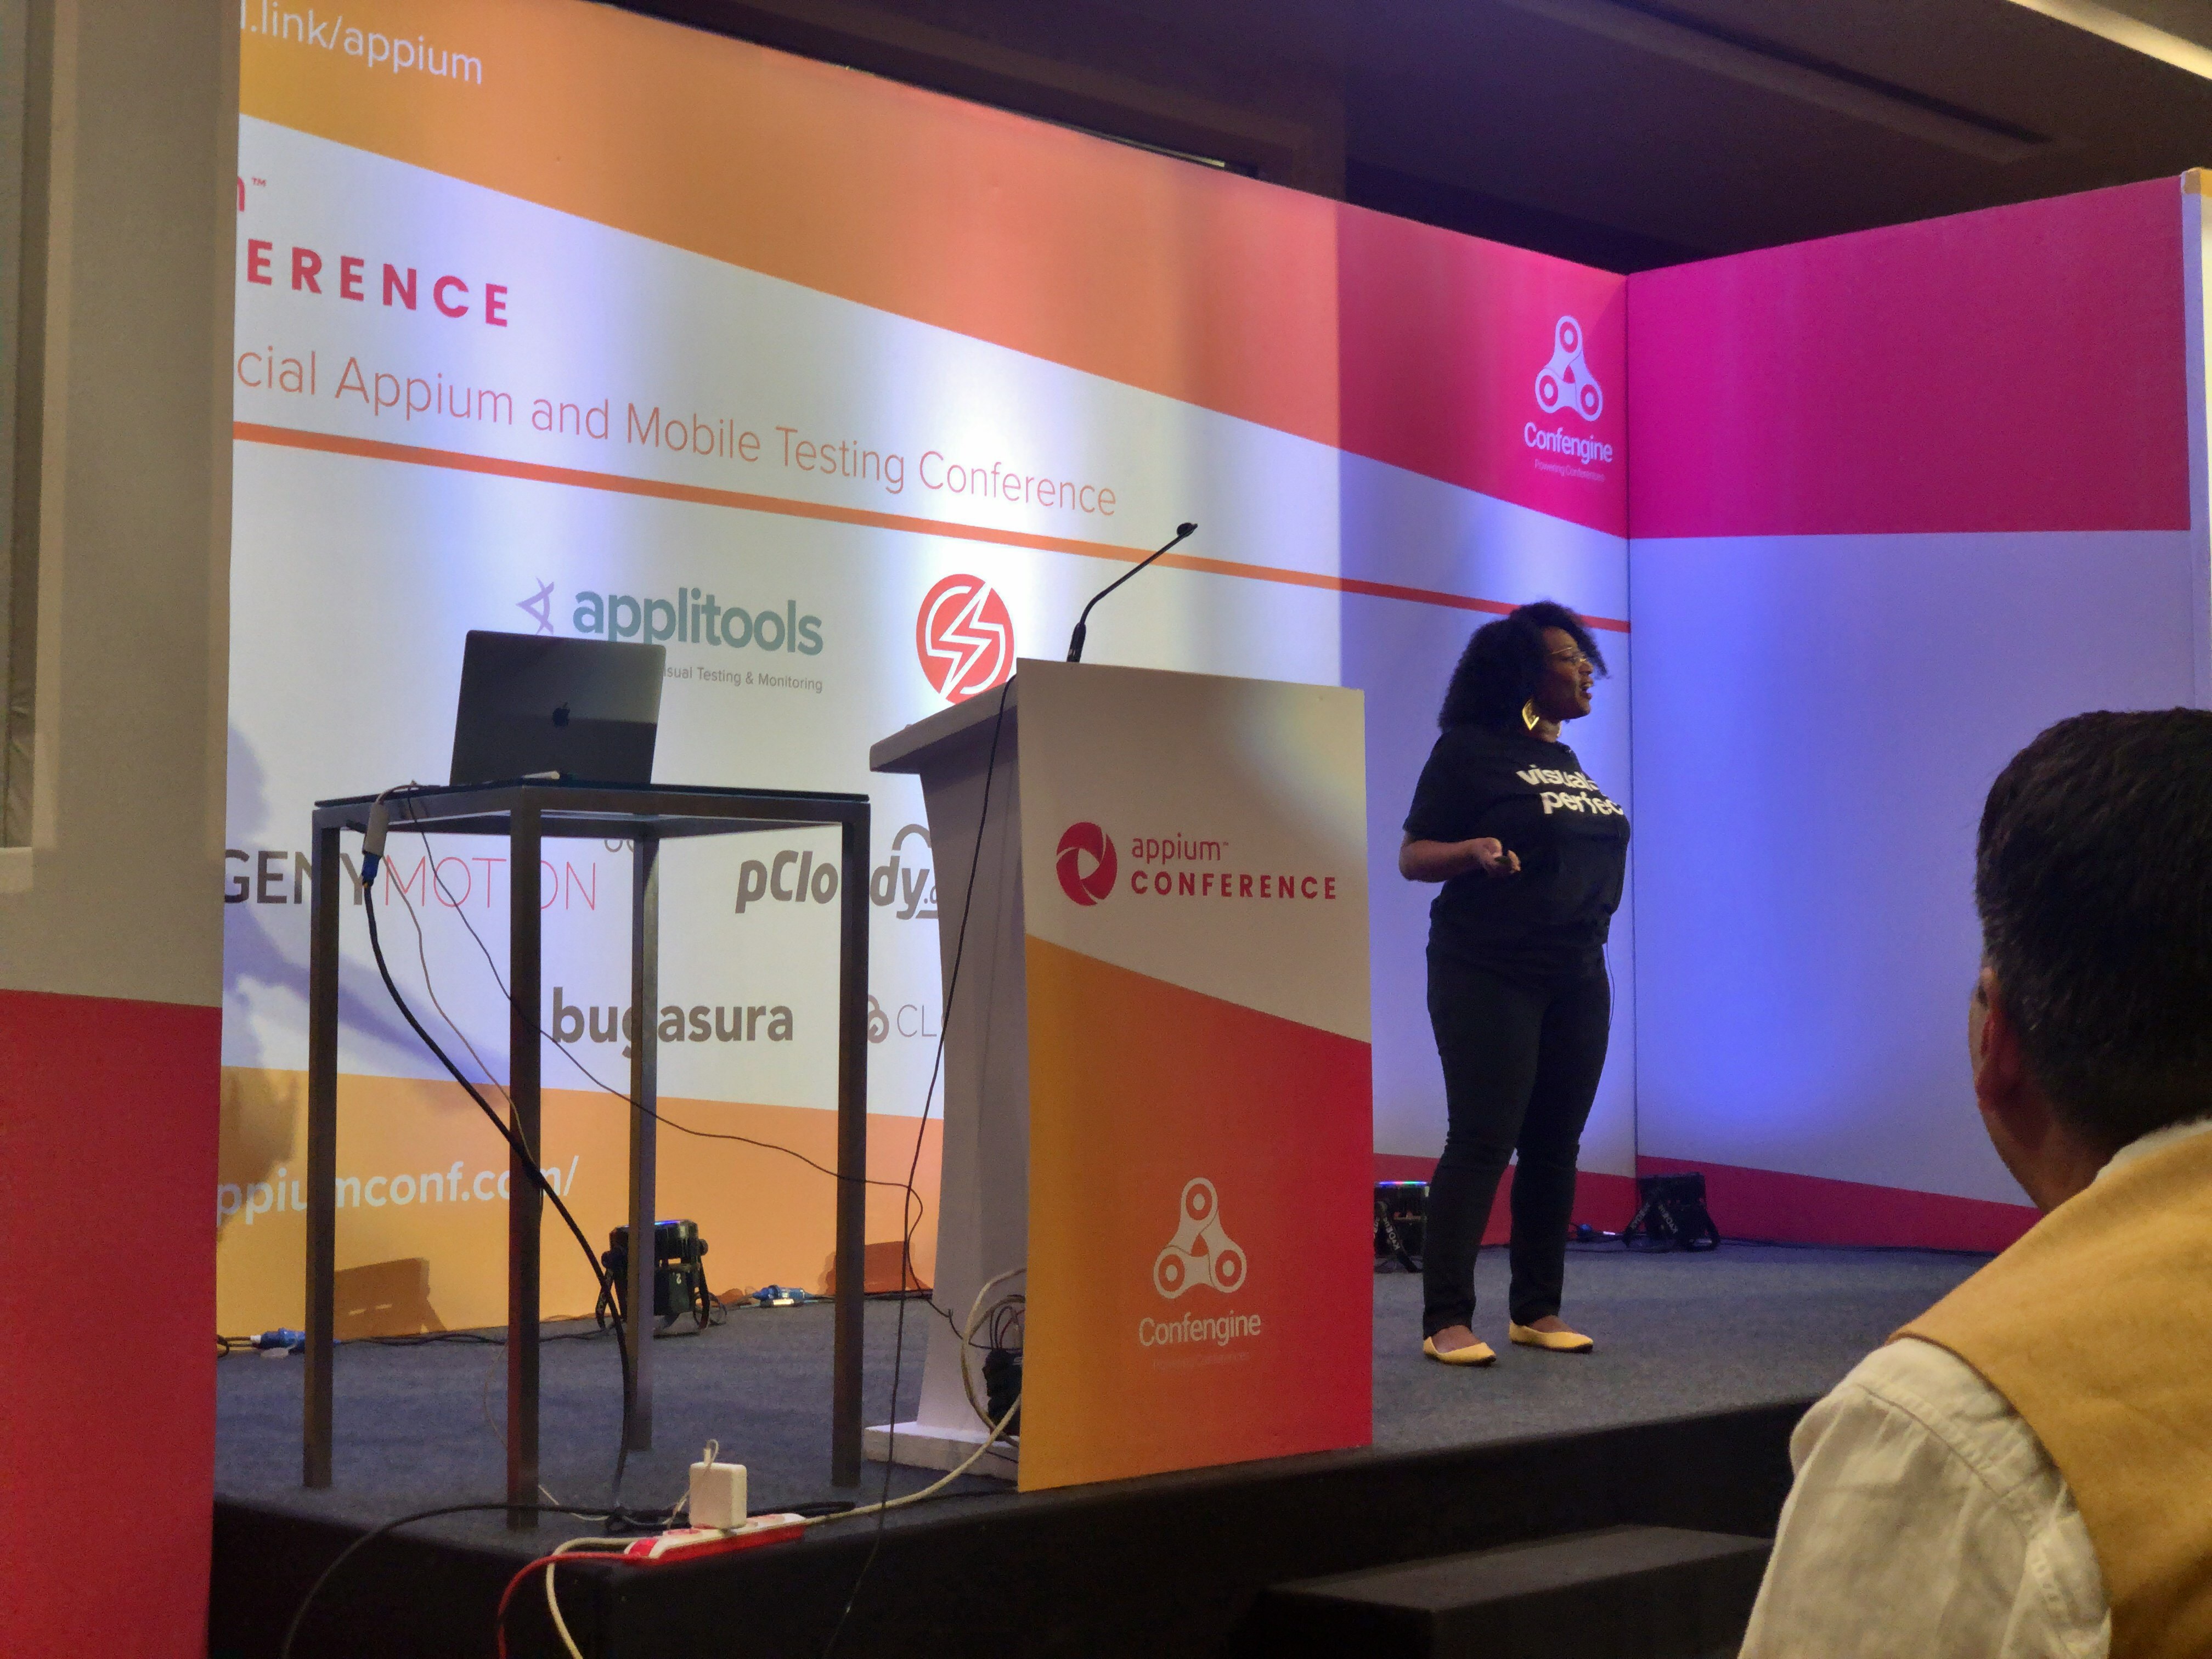
Angie Jones is a Senior Developer Advocate who specializes in test automation strategies and techniques. She shares her wealth of knowledge by speaking and teaching at software conferences all over the world, writing tutorials and technical articles on angiejones.tech, and leading the online learning platform, Test Automation University. I was impressed with a live demonstrate on stage how to tidy up Selenium test code in Selenium Conference 2019 in Tokyo. It’s nice to see her again in Bangalore with new shares.
Main takeaway: How to add visual validation (eyes) to your existing Appium framework and when and when not to use it
It’s easy to miss something you are not looking for
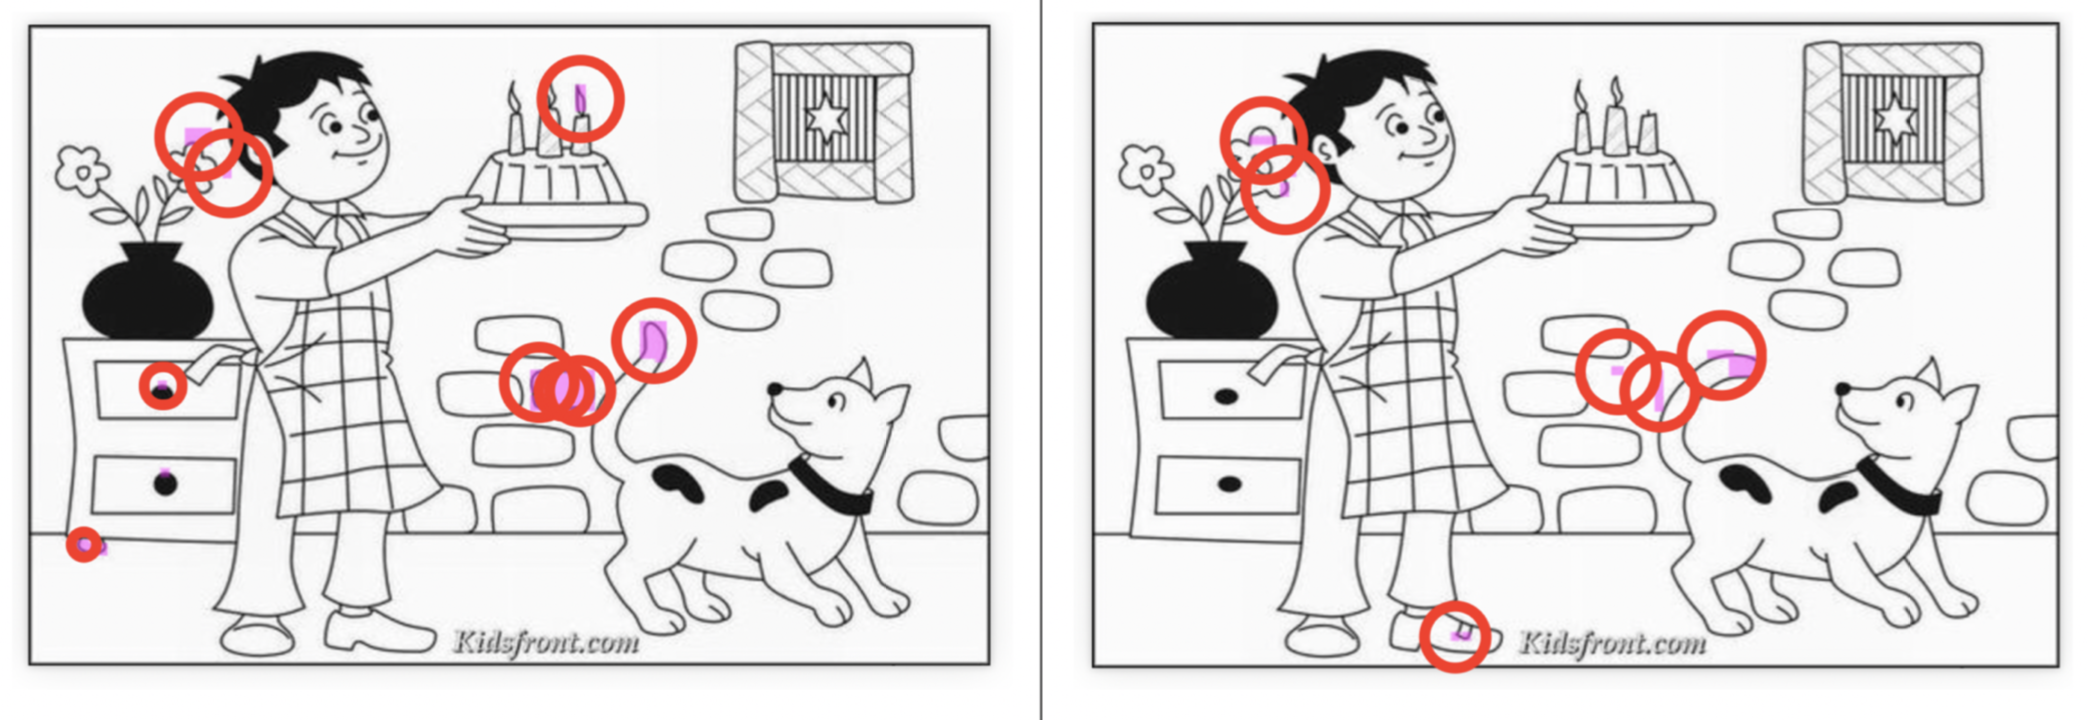
She gets started with “Test Your Awareness : Whodunnit?” video. It is really funny example to mention human omission while looking for differences.
Actually, I didn’t notice any of them, but when he mentioned 21 changes, I suddenly released that everything had been changed. It was instinctive. So, your subconscious does pay attention to these things, it just doesn’t think of it as important enough to consciously think of. Angie Jones thinks we all suffer from “inattentional blindness”. When testing an application, you just focused on features, and may not notice that other things that are occurring.
How do we solve for this? Automation?
For example, your scripts are supposed to make sure there’s some text is there, your scripts will be passed, but what about the text is hidden behind the other elements. A couple of layout bugs happens with favorite tech companies in the worlds like Amazon, Facebook, Twitter, Google as well.
Visual Validation can be automated
The way that visual validation works:
– Takes a screenshot of application at state you like to be in
– Then while regression testing, it takes another screenshot
– Compare those two screenshot (baseline and new screenshot) to make sure everything looks like you wanted to look.
Pixel by pixel comparison can be flaky
![]()
I think you’ve ever known about OpenCV and pixel by pixel techniques to compare image. So, visual testing is not something new. If you are using pixel in pixel in your project, you will release that how flaky there are. For instance, while automation testing the mouse has incidentally hovered over “Google Search” button, so the test would be failed.
Highlight only what matter
This technique created by Applitools with eyes API. This API highlights with matters it uses machine learning, just as human eyes, brain were, just pick up the thing we would care about.
Show time:
Let’s add eyes into project through some scenarios:
Application description: A TODO application allows you create new task and group task by colorful categories.
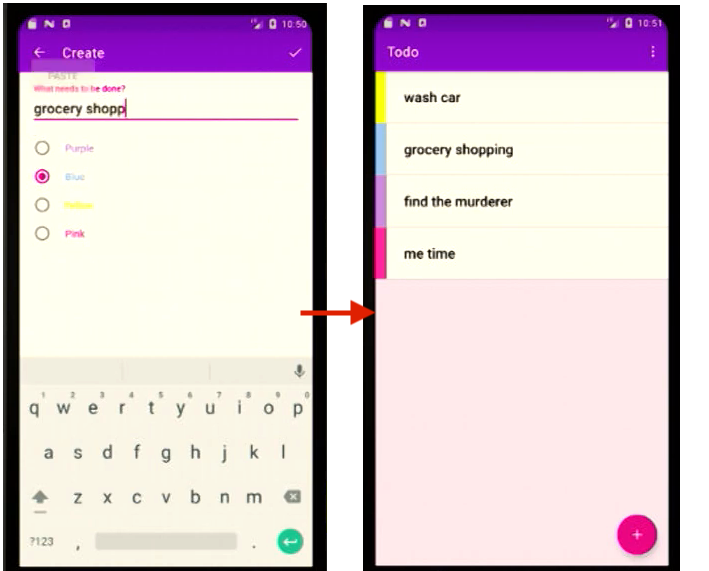
SCENARIO #1: Add multiple tasks of different categories
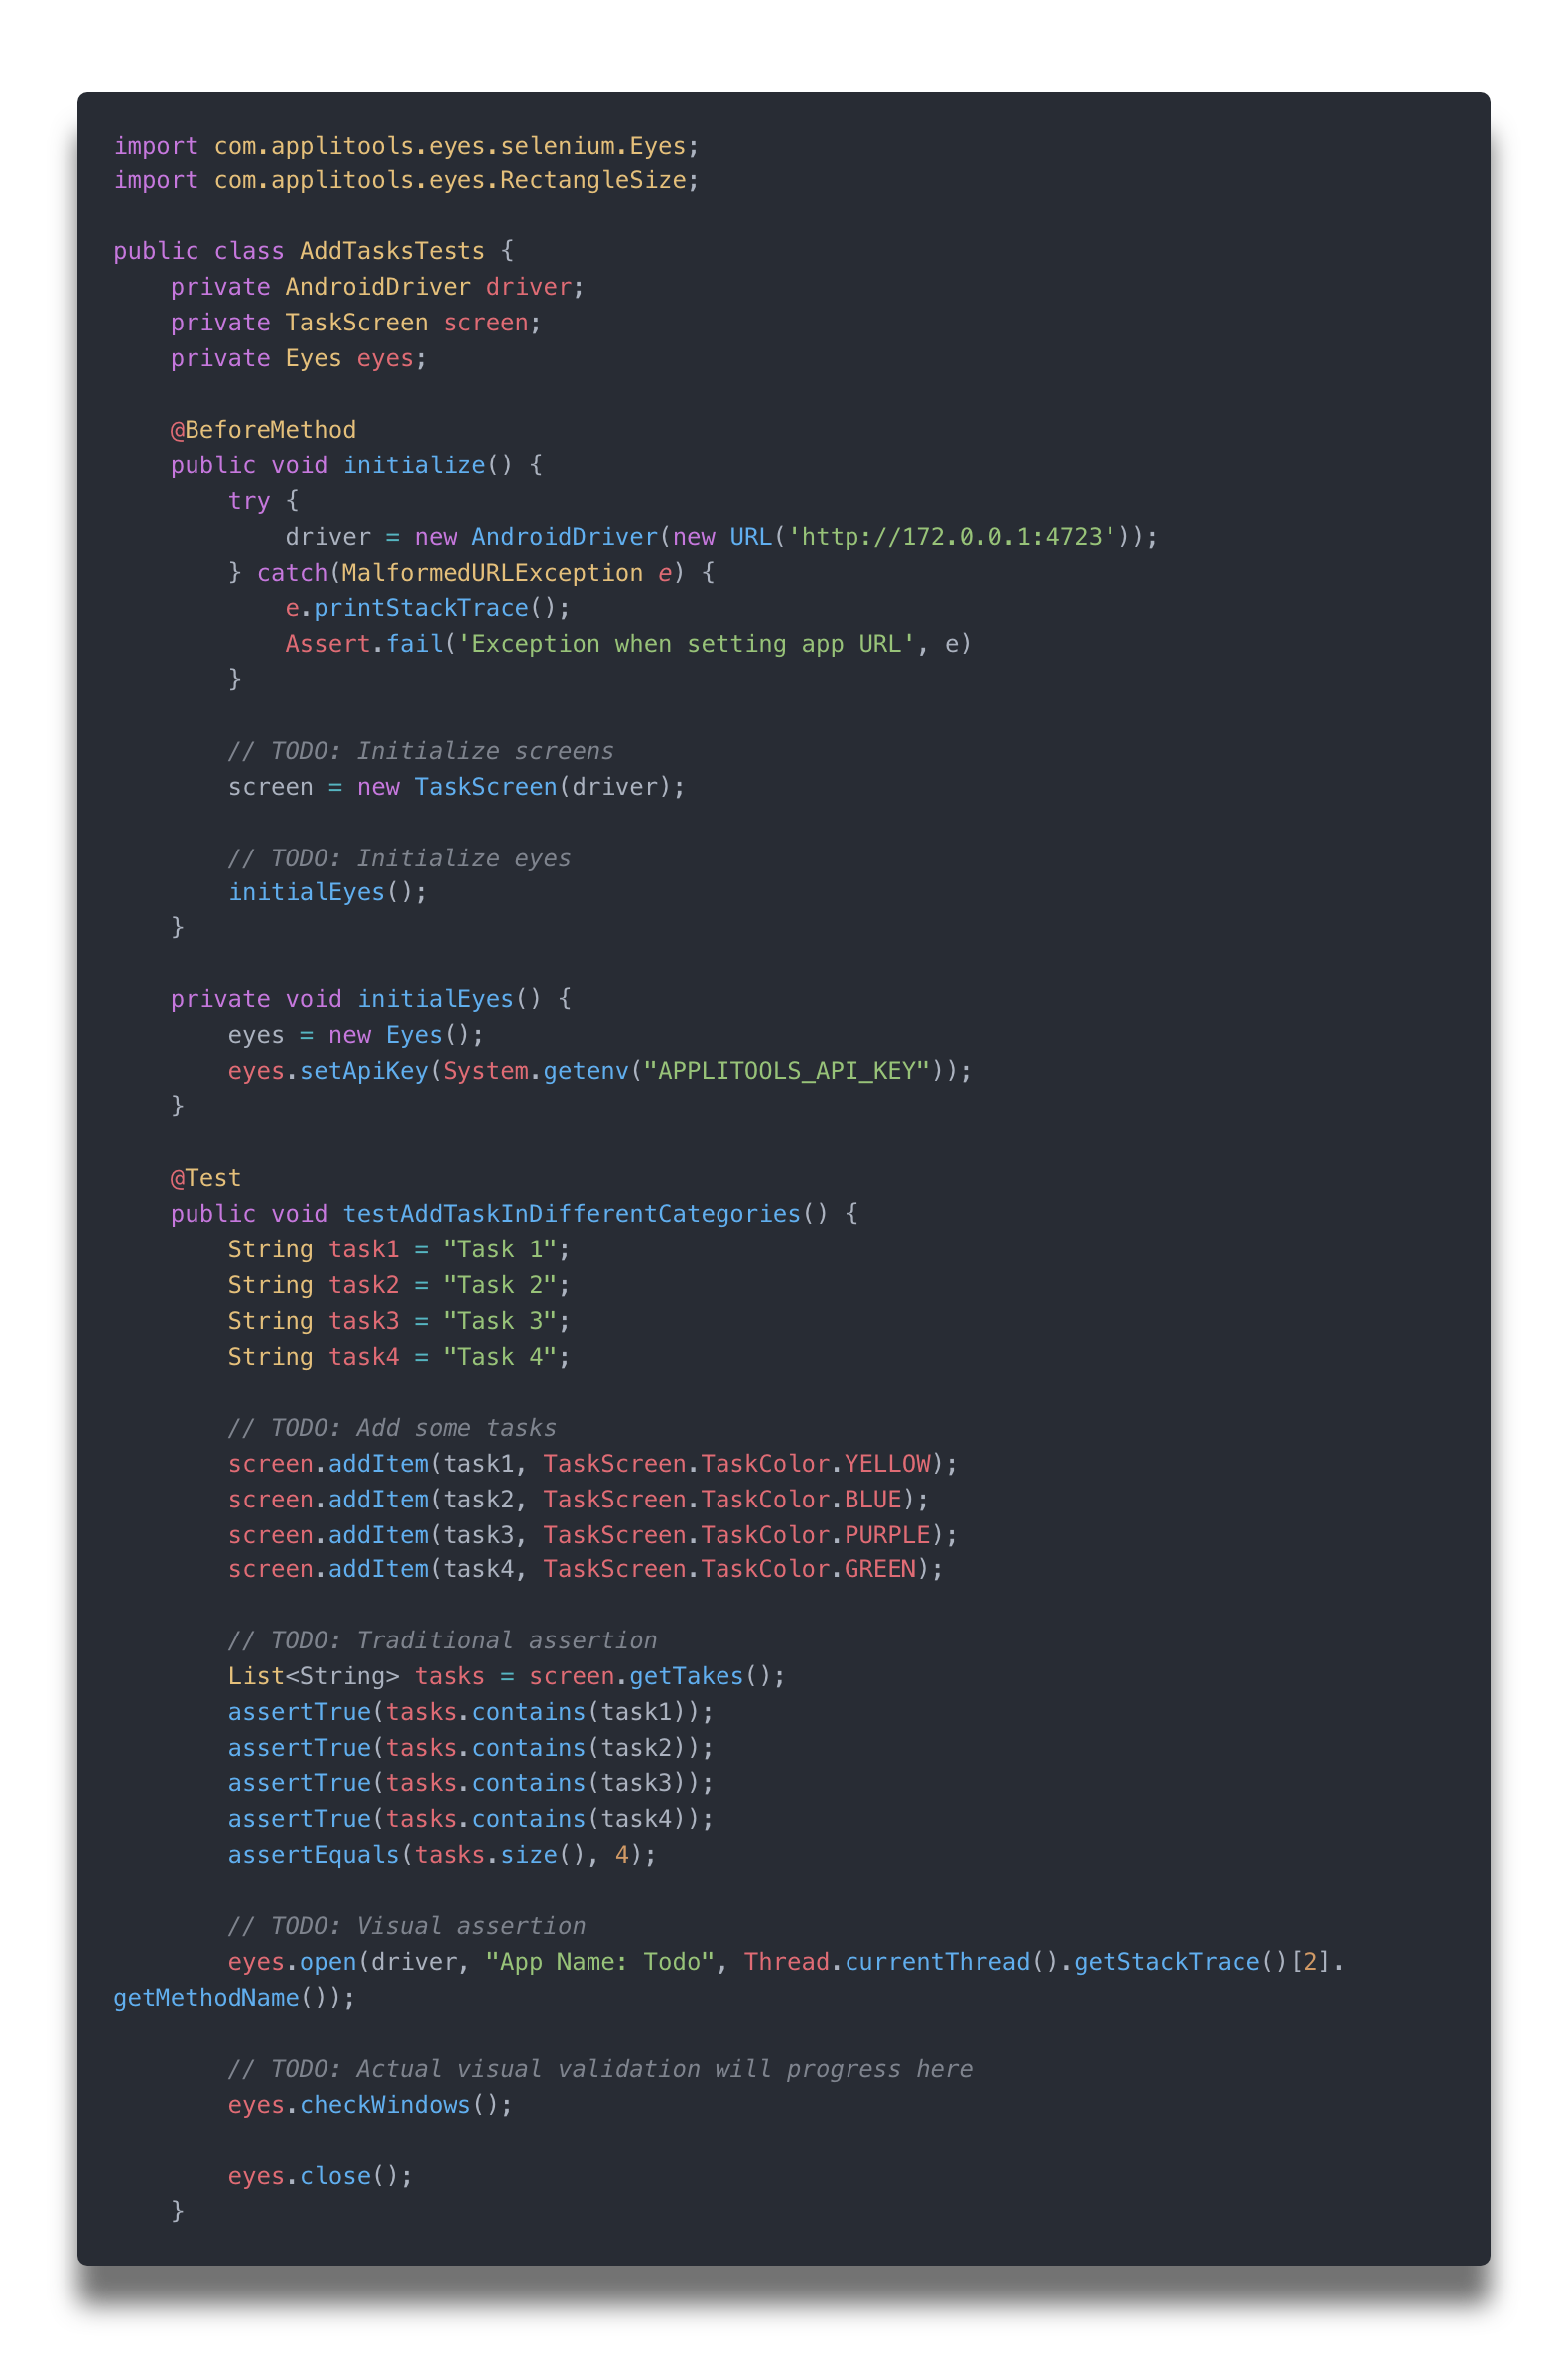
You can’t use the call to get the CSS value unsupportive for native app. We cannot get color attribute by Appium as well. Fortunately, Visual Testing can help use with this case. Not only task color will be verified, but also task name will be verified.
Props: Verify everything on screen
Cons: Because of verification entire of screen, unexpected element like navigation button, status bar (which changed every time of test execution) are verified as well. When you run test again, test will be failed. To solve this problem here, you can use check element instead of check window, or add ignore region (block-out) by Appitool management tools.
SCENARIO #2: Add multiple tasks and complete one of them
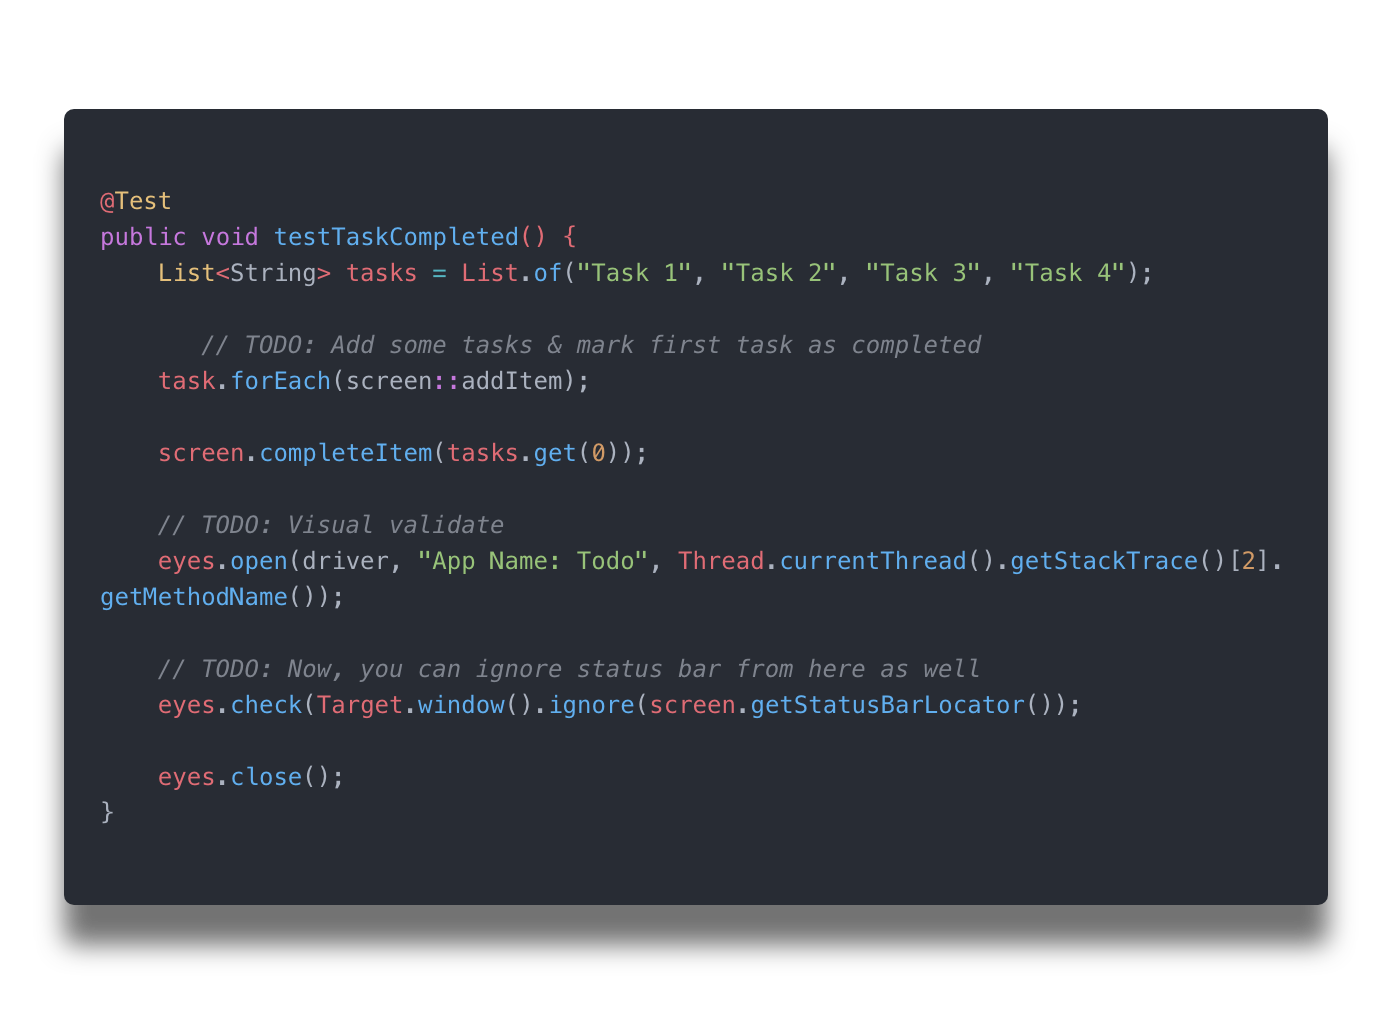
You can set directly regions in code to ignore while validation like status bar or something.
SCENARIO #3: Add long tasks (any categories)
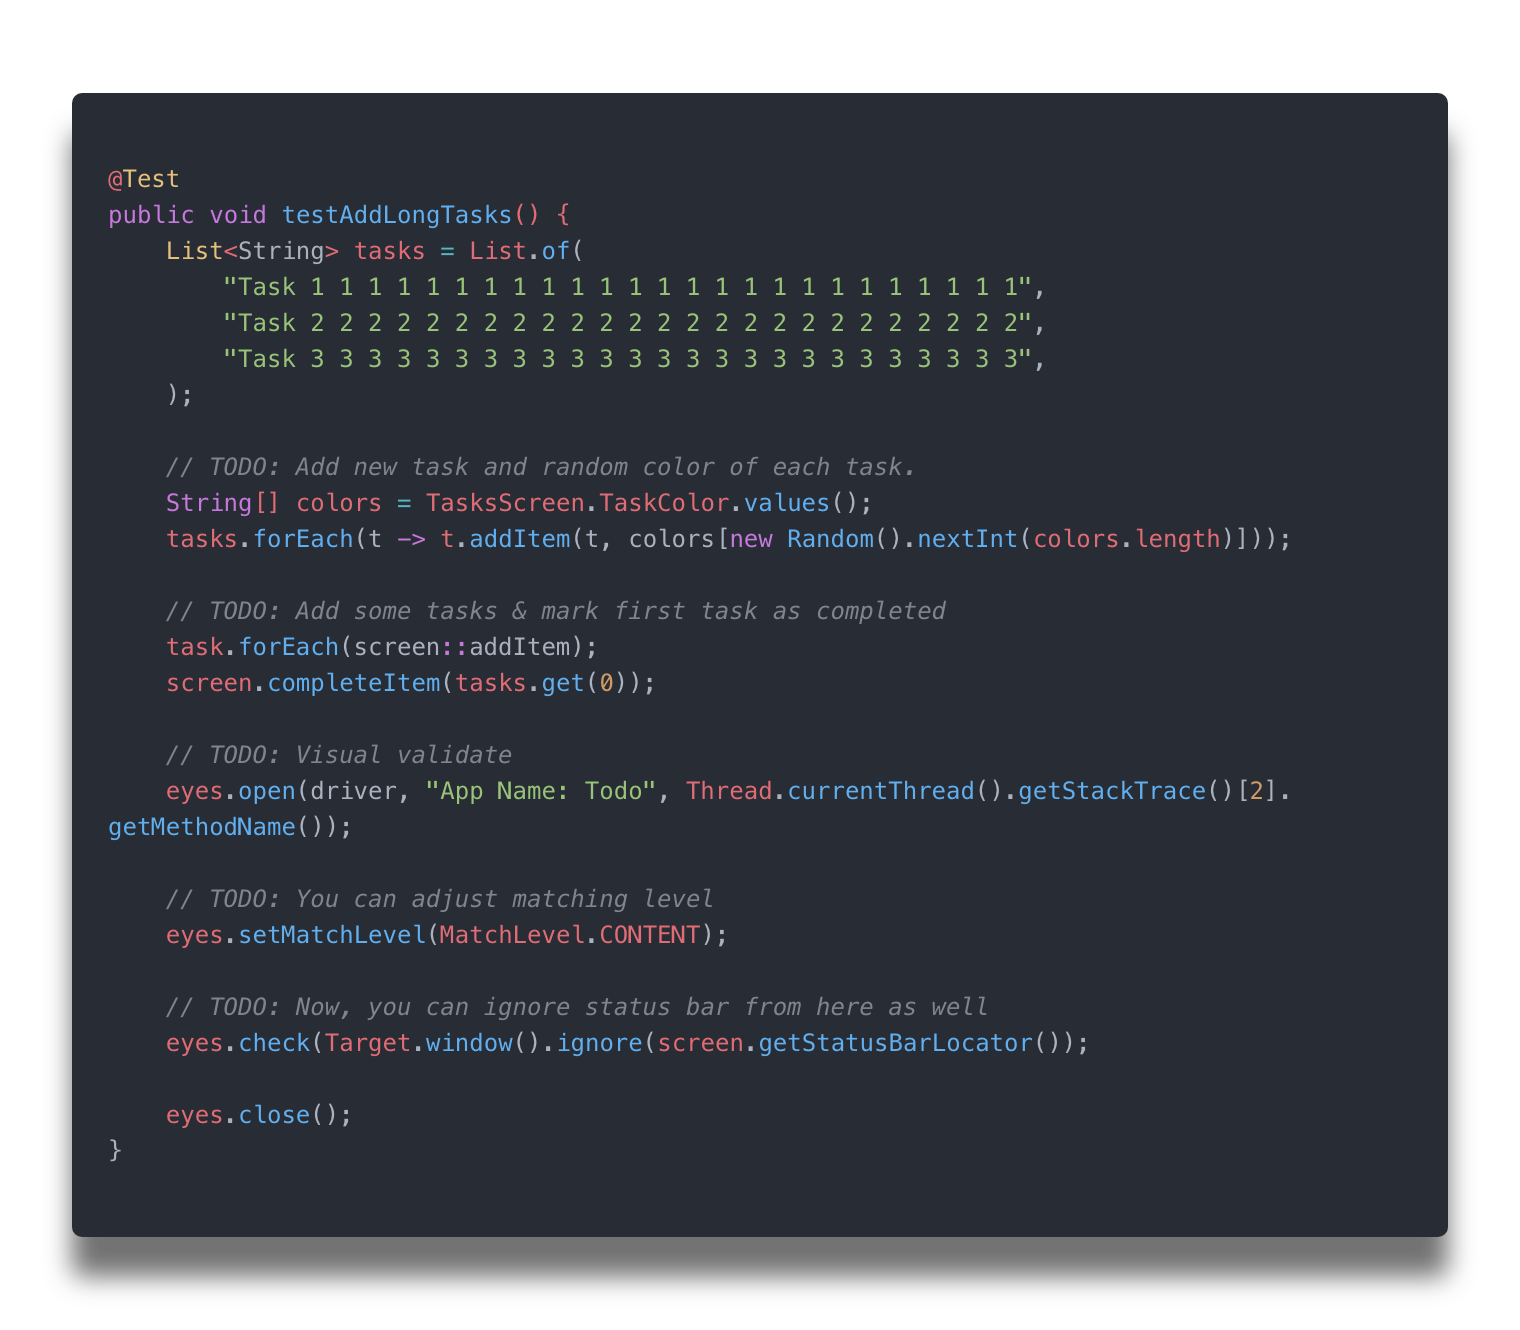
Currently, the category of task is dynamically added, so test will be failed if you verify category colors in task list as well. Solution for this scenario is just check only task name. In code, you could set match level into content.
SCENARIO #4: Verify dynamic lists with random tasks & colors
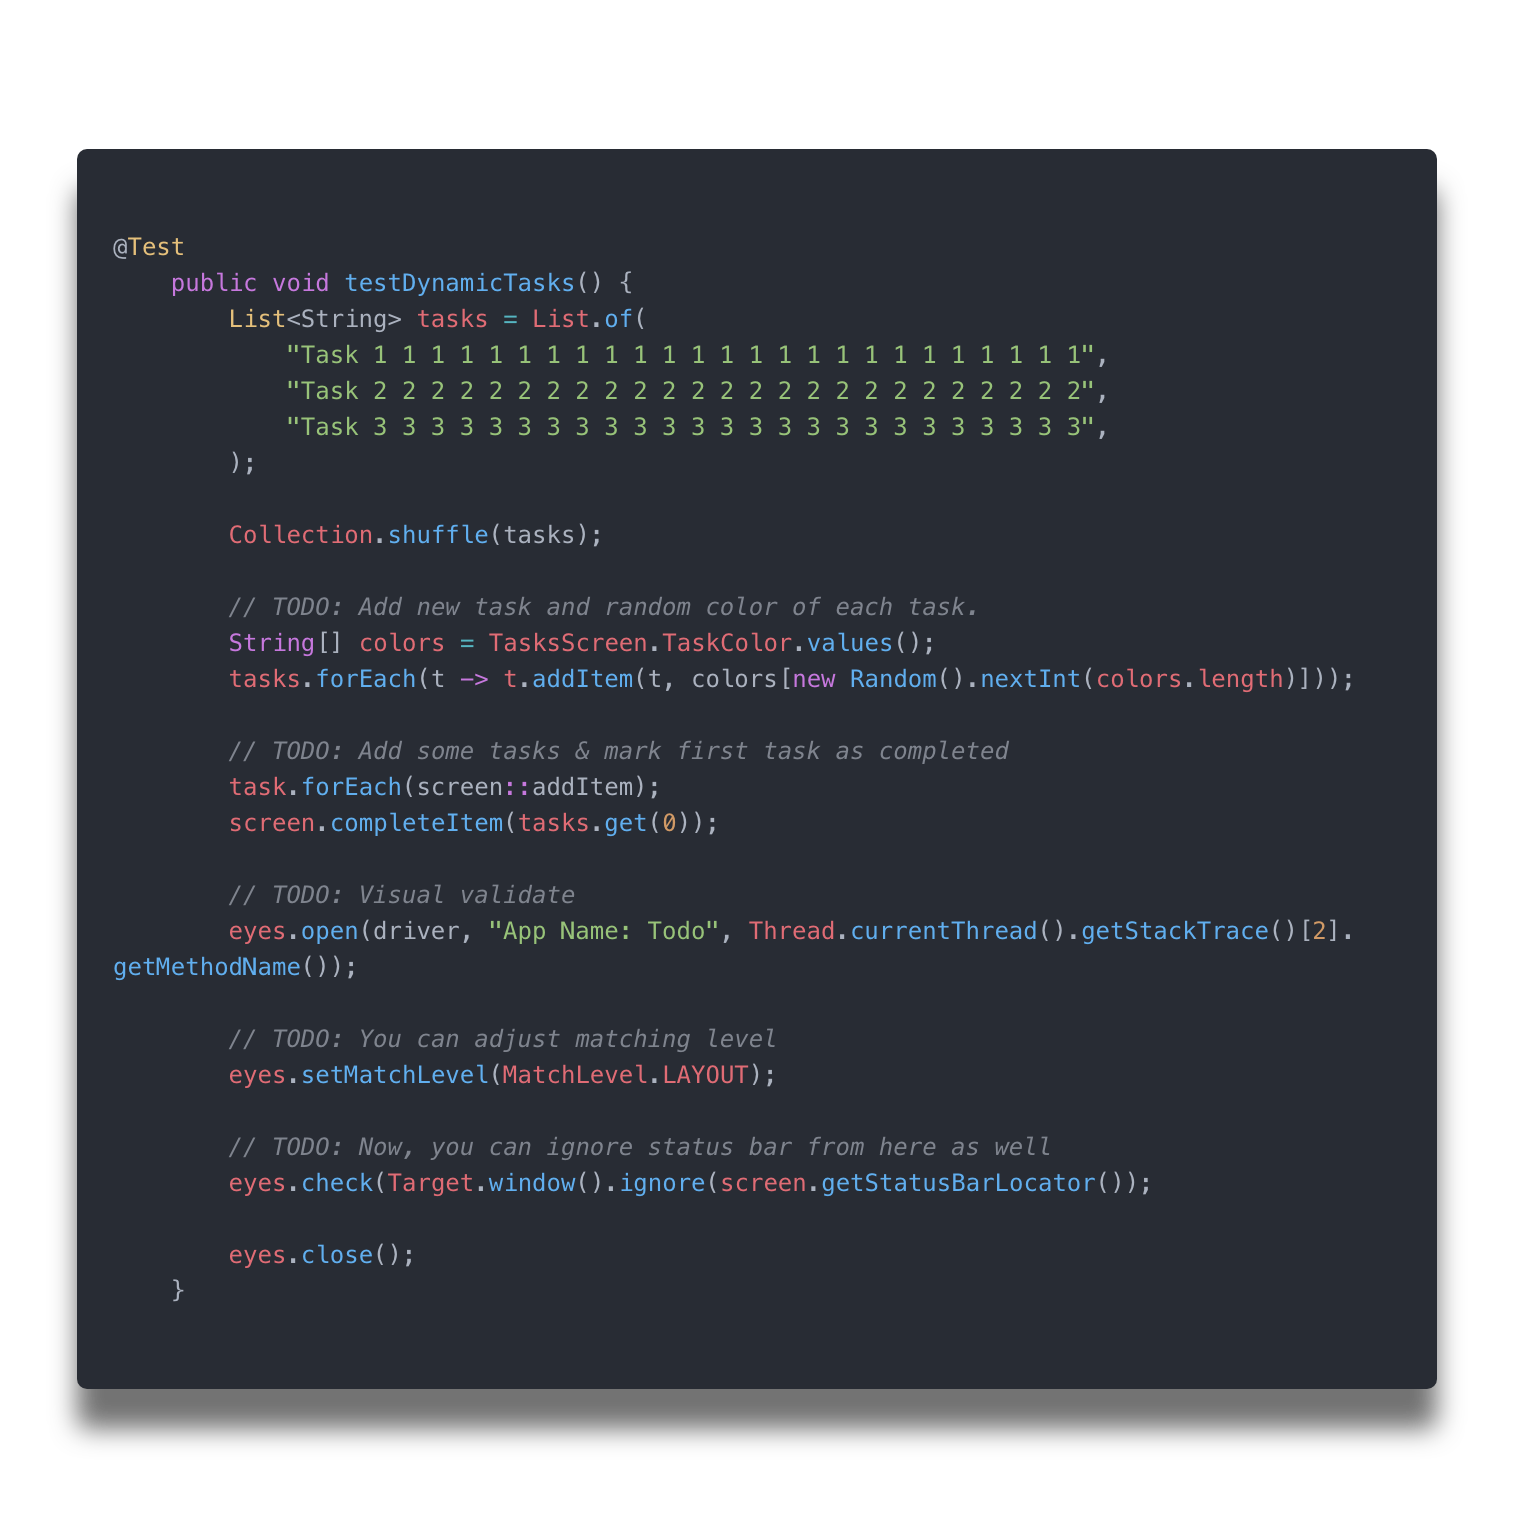
The last scenario, you can ignore another match level and verify only page layout by set match level to layout.
Conclusion:
I think you’re as impressed with this API skills as I’m. Nevertheless, I’m still wondering how this tool will deal with if application layout is often changed as News application (like Medium, so on). So, I think that adopting AI/ML into visual validation regression testing is best way to approach complex problem in testing.
__________________________________________________________________________________
[Best Practices]
Building your own native app visual testing module with Appium – Wim Selles
Video:
Slide:
Some introduction about Wim Selles. He is a 37 years old workaholic from the Netherlands. He’s working at SauceLabs who loves to automate web and or mobile web / app applications with JavaScript.
Main takeaway: How to create a visual comparison tool for native apps
One of old school style in approach to visual validation is pixel to pixel. In this talk, Wim Selles would expose reason why he used ResembleJS as core visual comparison solution among a lot of open-source and paid solution out there.
Requirement:
He has done some research based on below requirements:
- Support native app
- Cross platform
- Integrate WebDriver IO
- Paid tool === trial first
- Support block out (hide or cover something so that it cannot be seen, ignore particular region)
- Support element screenshot/bounding box
Block outs:
It’s mean you can set particular coordinates of box to ignore while comparing images.
Block out helps you exclude specified box like status bar, navigation bar, home indicator, animation or dynamic text on screenshot.
Research result:
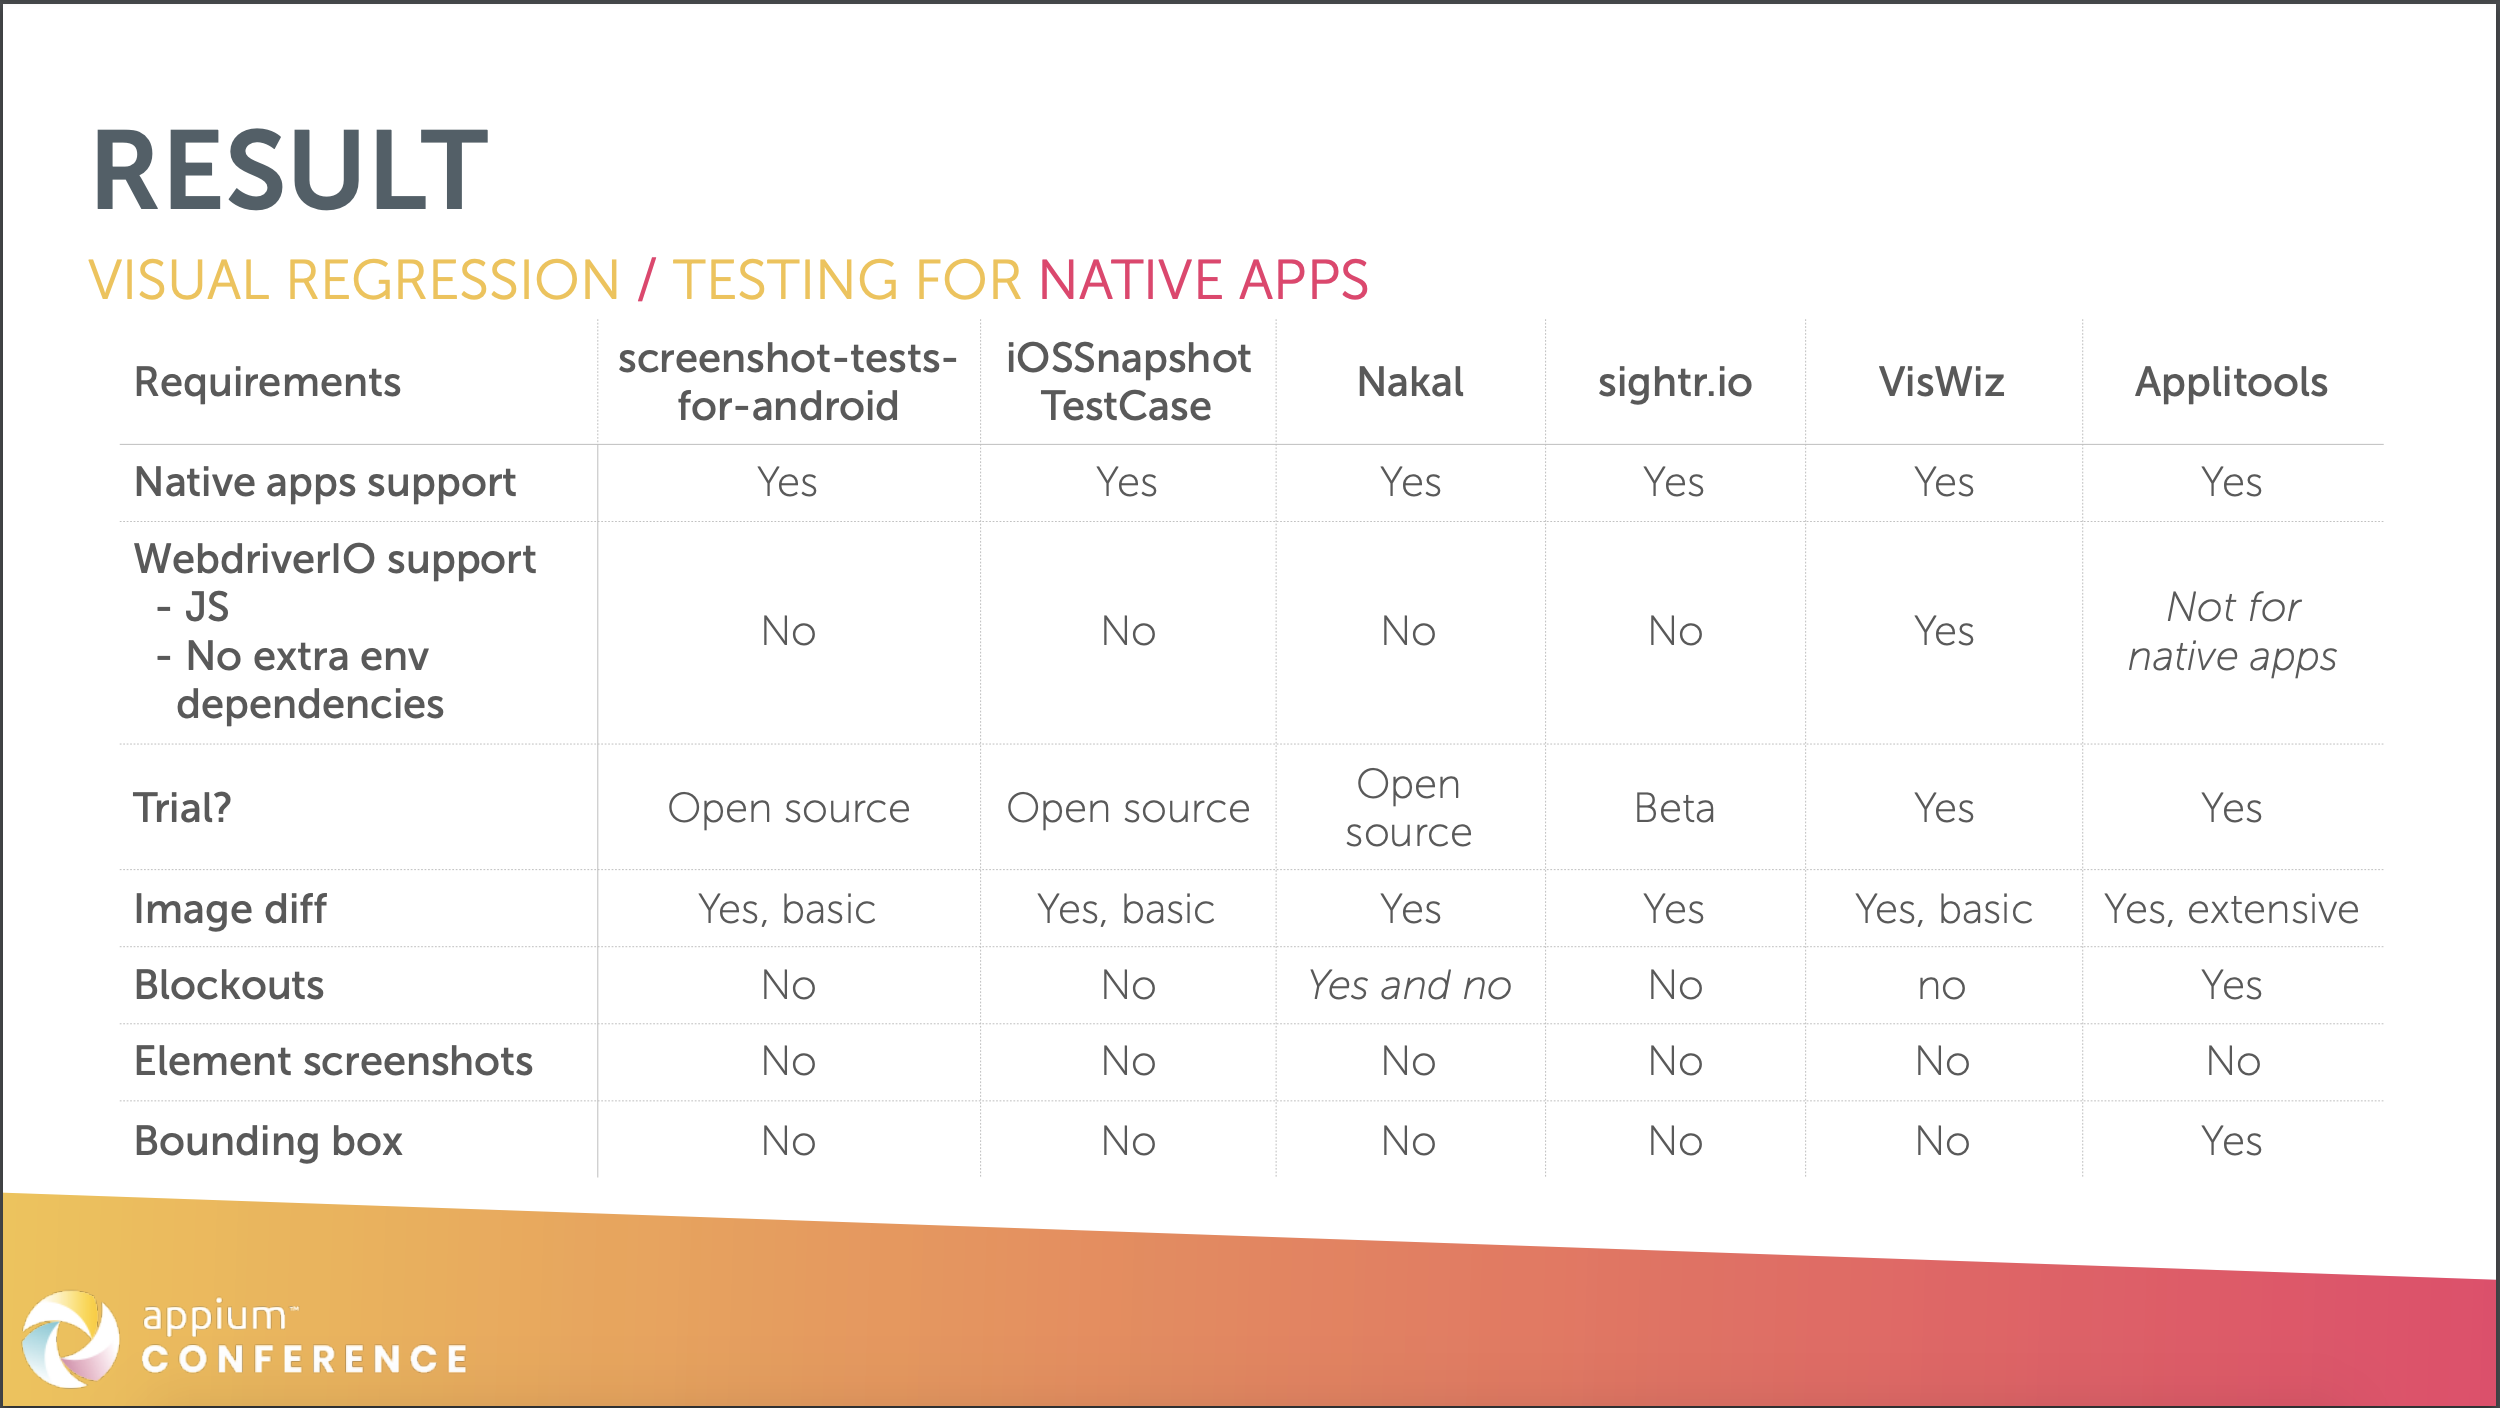
Reasons for not selecting below application for visual testing in project.
- screenshot-tests-for-android: only support for iOS
- iOSSnapshotTestCase: only support for iOS
- Nakal: not maintained anymore (latest commit about 3 years ago)
- sightr.io: only support for iOS
- VisWiz: did not support blackouts
- Appitools: did not support WebDriver IO for native application at the time they did a research
→ Conclusion: He has built a tool by himself.
Engine selection: JavaSript Pixel by Pixel libraries
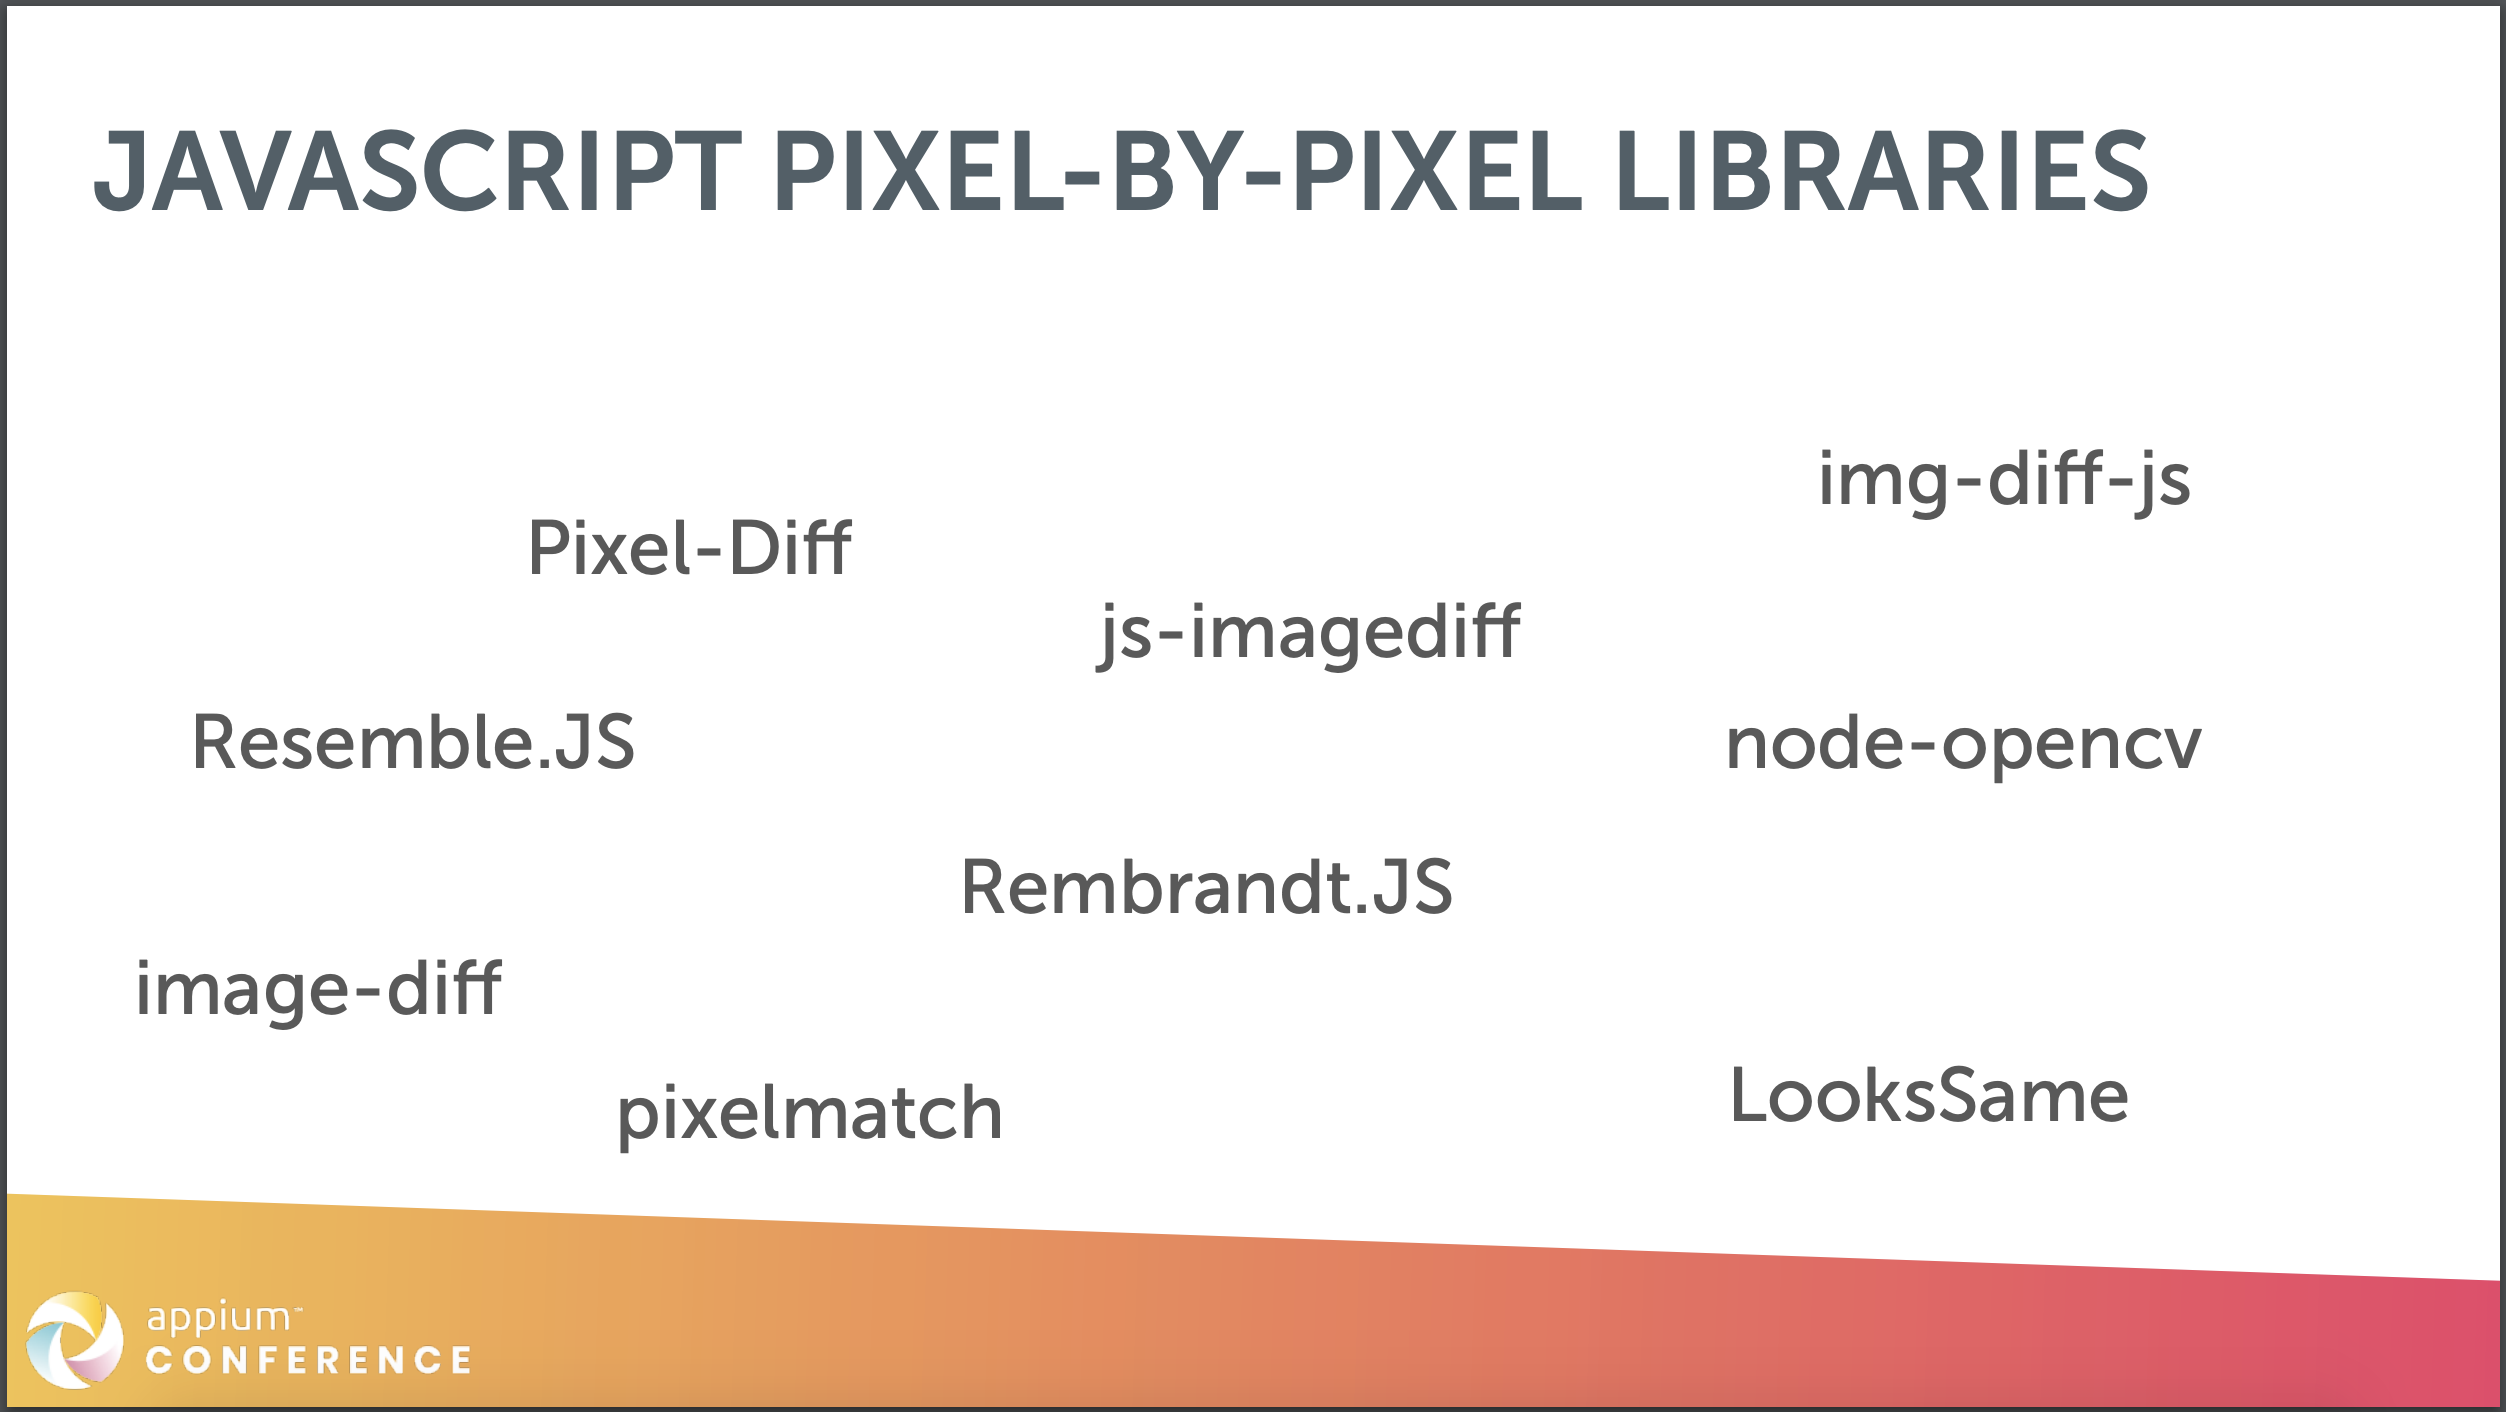
- image-diff, Rembrandt.JS, js-imagediff, img-diff-js: not to be actively maintained
- pixelmatch, LooksSame: not support blackouts
- Pixel-Diff: not accurate enough when did the pixel by pixel comparison
→ Conclusion: ResembleJS (If you want to use ResembleJS to compare images online by hand, you can check the online tool)
What should it do?
Let’s dive into each method before we start coding and check what need to do.
1. saveScreen: just save screenshot
2. compareScreen: Where could it go wrong, where could it cause flakiness? Which is challenge here?
- Status bar:
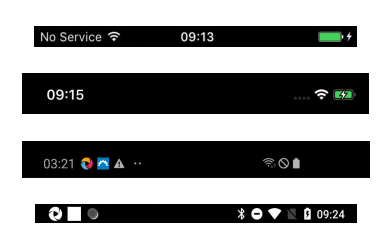
– iOS: you can easily get coordination and dimension of status bar from XCUIElementTypeStatusBar
– Android:
+ Samsung Galaxy S10: coordinates and dimension were already in bounds of element has id is android:id/statusBarBackground
+ Google Pixel: status bar element couldn’t be found.
→ What should we do here?
→ Use Settings API which Appium provided and allow display all unimportant views on screen
POST /session/:sessionId/appium/settings
body: { settings: { ignoreUnimportantViews : true }}
- Navigation bar: no status for iOS, so you can adopt the same way as above.
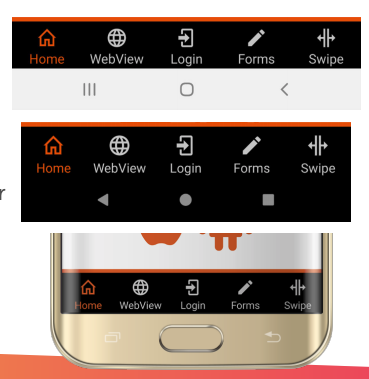
– Home bar indicator: iPhone X series:

+ Currently 2 sizes: Because Apple has limited devices so we can just determine different width of screen (static block)
+ Behavior can be adjusted
3. saveElement:
W3C already had API to take element screenshot.
https://www.w3.org/TR/2015/WD-webdriver-20150827/#take-element-screenshot
4. compareElement:
- Comparing (options) is the same as compareScreen.
- Element block outs more complex
Disclaimer:
Cons:
- Basic comparison
- Impact on project
- Limited block out options
- No dashboard
Pros:
- Open source
- The (module) logic is easy
- Easy cross platform/device block out logic
Want to use it?
https://github.com/wswebcreation/wdio-native-app-compare
Conclusion:
Throughout this talk, we would go much further in depth and dive into some things like selection library to build up a module for visual comparison by pixel by pixel. With plenty of devices out there, visual regression testing is extremely necessary. I’m still wondering about some case if using this tool in real life. I’m going adopt this tool real project and share you more my knowledge afterward.
[END]